The Asphalt Paving Process Explained: What to Expect from Start to Finish
Asphalt paving is a fundamental part of modern infrastructure. Whether it’s for a residential driveway, commercial parking lot, or a major highway, asphalt provides a durable, cost-effective surface that can handle heavy traffic and withstand various weather conditions. Understanding the process of asphalt paving from beginning to end can help property owners, developers, and project managers make informed decisions, anticipate potential challenges, and set realistic expectations. This comprehensive guide explores the asphalt paving process in detail, explaining every step from planning to final inspection.
Project Planning and Site Evaluation
Before any asphalt is laid, extensive planning and site evaluation must take place. The first stage involves determining the scope of the project, which includes understanding the size of the area to be paved, the anticipated traffic load, and any specific requirements related to drainage, slope, or nearby structures. A thorough site inspection is conducted to assess the condition of the existing ground or pavement. This may include checking for soft spots, measuring elevation changes, identifying utility lines, and testing soil composition.
Based on the evaluation, engineers or contractors develop a paving plan that includes material specifications, thickness of each layer, and a proposed timeline. Permits and approvals from local authorities are obtained if necessary, particularly for public roads or environmentally sensitive areas. Proper planning ensures that the project meets all safety and regulatory standards and minimizes unexpected delays. During this phase, budgeting is finalized, taking into account materials, labor, equipment rental, and any contingencies for weather or unforeseen site issues.
Surface Preparation and Demolition
Once planning is complete, the physical work begins with surface preparation. If there is an old asphalt or concrete surface, it is typically removed using heavy machinery such as bulldozers, backhoes, or milling machines. This demolition phase is essential to eliminate any damaged or unstable material that could compromise the new pavement. Recycled asphalt from the old surface can often be reused, which is both environmentally responsible and cost-efficient.
After demolition, the area is cleared of debris and the subgrade (natural soil beneath the pavement) is prepared. The subgrade must be compacted to achieve the required firmness and stability. Poor compaction can lead to future problems such as cracks and potholes. In some cases, additional materials like crushed stone or gravel are added to improve the strength and drainage capability of the base. Proper grading ensures that water will run off the pavement rather than pooling, which is crucial to prevent erosion and extend the lifespan of the asphalt.
This phase also involves installing drainage systems if necessary. Catch basins, pipes, and ditches may be placed to guide water away from the pavement. Ensuring proper drainage at this stage protects the integrity of the pavement over time.
Laying the Base and Binder Layers
With a stable subgrade in place, the next step is to lay the base and binder layers. The base layer, usually composed of crushed aggregate, is spread and compacted to form a strong foundation. This layer provides structural support and enhances load distribution, preventing deformation under heavy use. The thickness of the base layer varies depending on the expected traffic load and type of project. For residential driveways, a thinner base may suffice, whereas roads and highways require a thicker base to support larger vehicles.
After the base, the binder layer is installed. This layer consists of large aggregate mixed with oil to create a durable and flexible surface that can handle stress from traffic. The binder acts as a buffer between the base and the top asphalt layer, absorbing and distributing loads to reduce the risk of cracks and damage.
Each layer is carefully compacted using rollers to remove air pockets and ensure uniform density. Improper compaction can lead to weak spots that deteriorate quickly. During this phase, inspectors may take core samples or use testing equipment to verify that compaction and material quality meet required standards. It is critical that all layers are level and even to support the smooth installation of the final surface.
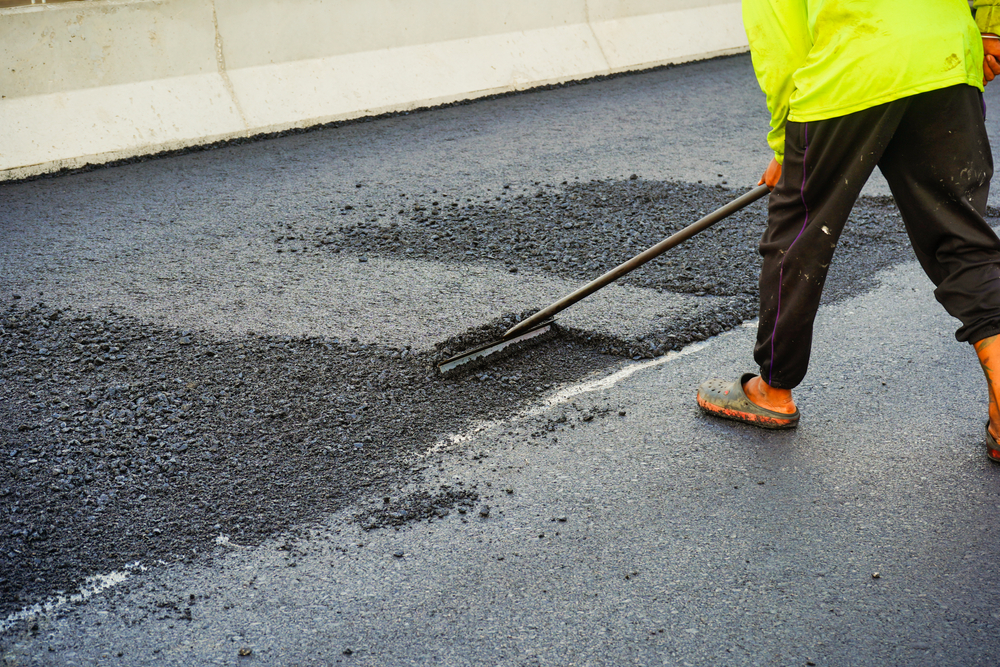
Installing the Asphalt Surface Layer
The most visible part of the paving process is the application of the top asphalt layer. This is the surface that vehicles and pedestrians will use, so it must be smooth, aesthetically pleasing, and durable. The asphalt mixture for this layer includes smaller aggregates and a higher concentration of bitumen, which gives it a fine texture and a dark black finish.
The hot mix asphalt is delivered to the site in trucks and laid down using a paving machine that spreads it evenly. Skilled operators must ensure the asphalt is applied at the right thickness and temperature to maintain quality and workability. If the mixture cools too quickly, it becomes difficult to compact and bond properly. Therefore, coordination and timing are critical during this stage.
After the asphalt is laid, it is compacted using heavy rollers to create a dense, even surface. The compaction process not only enhances the appearance of the pavement but also helps to lock in the materials and remove voids that could allow water infiltration. In areas with curves or transitions, hand tools may be used to ensure the asphalt meets edges cleanly and blends seamlessly with adjacent structures.
As the asphalt cools and hardens, it begins to form a resilient surface capable of handling traffic. Depending on the weather and thickness of the pavement, the new surface may be ready for use within 24 to 48 hours, though larger or more complex projects may take longer.
Final Inspection and Maintenance Considerations
The final stage of the asphalt paving process involves a detailed inspection and implementation of maintenance practices. Once the surface has cooled and set, inspectors evaluate the quality of the installation. They look for uniform thickness, proper compaction, smooth transitions, and well-defined edges. Any visible imperfections such as surface bumps, dips, or segregation in the asphalt mixture are documented and addressed.
In addition to visual inspection, non-destructive testing methods may be used to assess compaction and structural integrity. For projects involving public roads or commercial lots, this final review ensures the pavement meets all design and safety standards before it is opened for use.
After successful inspection, striping and signage can be added if needed. Parking spaces, crosswalks, and traffic lines are marked using specialized paint that adheres to asphalt and remains visible over time.
Although a newly paved surface is strong, it still requires regular maintenance to maximize its lifespan. Routine tasks include sweeping debris, sealing cracks, and applying sealcoat every few years. Sealcoating helps protect the surface from UV rays, water penetration, and oil spills. In colder climates, it’s also important to remove snow and ice promptly to prevent damage from freeze-thaw cycles.
Proper maintenance not only preserves the appearance and function of the pavement but also helps reduce the frequency and cost of major repairs. With good upkeep, a quality asphalt surface can last 15 to 25 years or more, offering excellent value for investment.
Conclusion
Understanding each phase of the asphalt paving process allows stakeholders to better manage their projects and avoid common pitfalls. From planning and preparation to final inspection, every step plays a crucial role in achieving a successful and long-lasting result. By working with experienced contractors and staying informed, property owners can ensure that their paved surfaces meet both functional needs and aesthetic goals.
Ready to Get Started?
We here at MVP Paving are a family-owned business with over 20 years of experience. Our company is headed by a fourth-generation asphalt contractor who has been present at job sites for decades, ensuring satisfied customers all the while. We specialize in residential and commercial projects new and old. From driveways to parking lots, seal-coating to striping, our state-of-the-art equipment and crew are ready to handle it all. We treat you like the MVP, offering free estimates and same-day pricing in order to finish the job promptly and efficiently. With us, there are no gimmicks; just results! Contact us today for your free estimate!
Categorised in: Asphalt Paving